


So, I was overjoyed when I saw this post on one of my favorite blogs, Thrifty Decor Chick. Sarah used pine wood planks instead of the acutal heavy, expensive boards I've seen in most posts. These planks are much ligher and cheaper than boards (under $11 for each package at Lowe's)! Literally the day after I saw Sarah's post, I went out and bought all of the supplies for my headboard and got to work. It also helped that we just bought a new mattress, pillows, and sheets and our room has been begging for attention ever since we moved in almost a year ago! It's been the one of the last rooms on my decorating list and hasn't gotten the attention it needs. Anyway, without further delay, here is the tutorial:
Supplies
EverTrue 8'H Stain Grade Knotty Pine V-Groove Plank Paneling from Lowe's - $10. 97
Titebond 4 oz Wood Glue Adhesive- $2.99
Grip-Rite 6 oz 16.5-Gauge 1-in White Panel Board Nails-$2.47
Rust-Oleum 8 oz Dark Walnut Stain- $4.97
2- 2x4s (already had)
4 wood screws long enough to go through 2x4s and into studs in wall
Total Cost: $21.40
Process
Since we only have a full-size bed {we like being cozy} I was able to get away with only buying one package of the plank paneling. Each package contains 6, 8-foot panels and I had Seth cut them in half to make 12, 4-foot panels. With the panels cut, the total width and height of the headboard is 4 feet wide by 3.5 feet tall. I also had Seth cut some 2x4s to a little less than 3.5 feet.

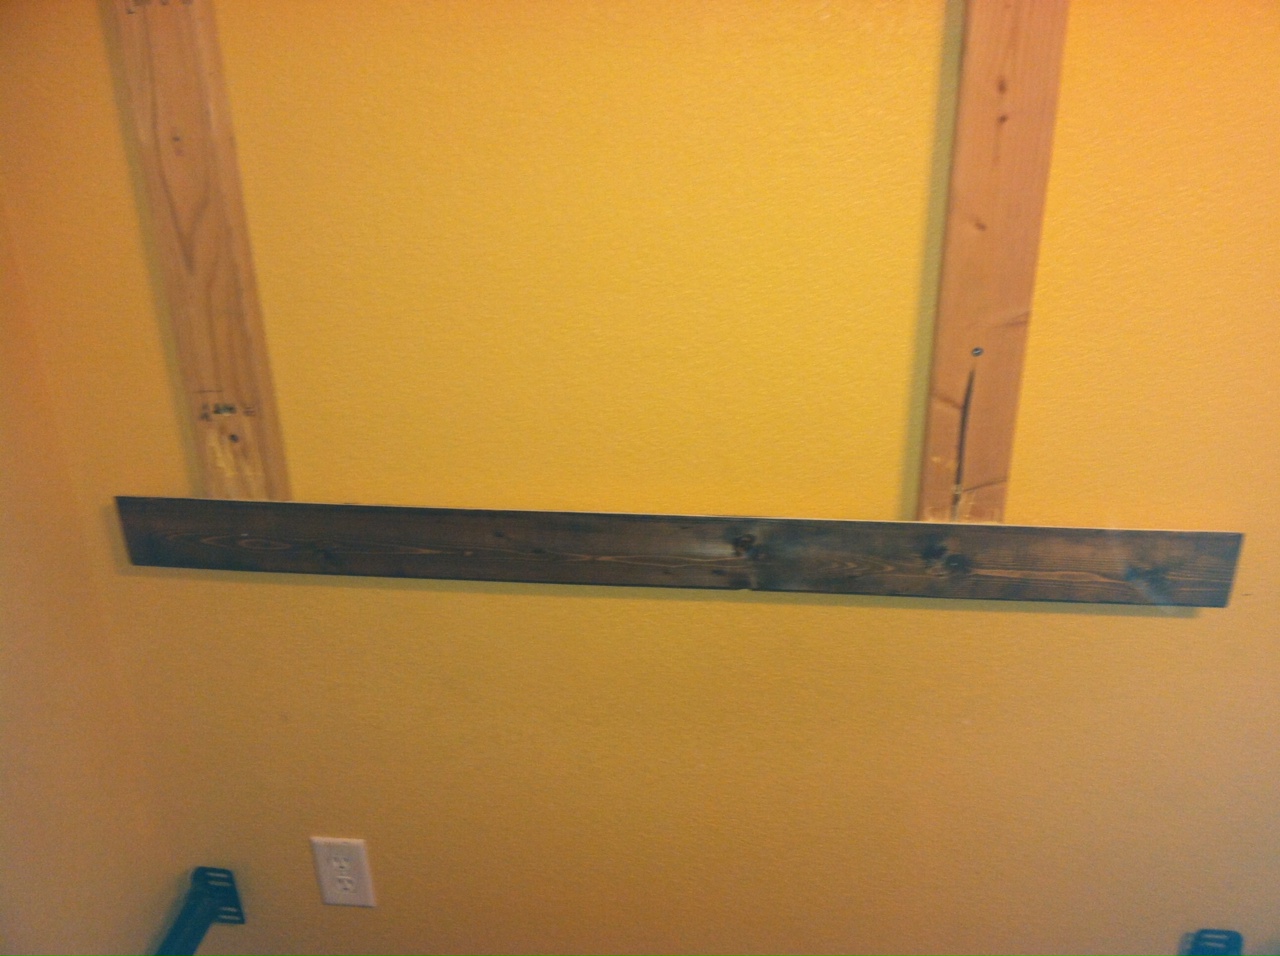
The next day, the panels were dry and ready to be put up. I started by measuring the height of our bed and making a marking on the wall so we would know where to attach the 2x4s. Seth then helped me by finding the studs in the wall where I wanted to put the headboard and attaching the 2x4s to the studs using 4 screws {so there are only 4 holes in my wall-YAY}!


I did this for each panel, using a wet rag to wipe up any excess glue that came through the cracks. These panels are v-grooved so they snapped together and held in place nicely.


Adding these lights significatly increased the cost of this project. But, since it was a new week, I had more "blow money" to spend anyway. I used the same wiring technique that I did for my swag chandelier and just plugged the cords into two separate power switches so that Seth and I can each have our own controls.

Here is what the headboard looks like now, complete with reading lights! The lights look super bright in this picture but they aren't. I used 25 watt bulbs so that it possible to sleep if my hubby is up reading :)

Now all I need is a few cute, decorative pillows for our bed and to finish the other set of curtains in our room!
Hope you enjoyed this post! I've added pictures of this to my
Pinterest board as well if you want to repin.
http://pinterest.com/pin/31103053647732601/
http://pinterest.com/pin/31103053647732611/
http://pinterest.com/pin/31103053647623023/
I am going to use these exact same wood planks for a wall in my master bathroom behind our whirlpool tub! Only i will be staggering the planks and staining them in varying shades of the dark walnut! So excited I cam across your blog! Oh and your headboard looks great!
ReplyDeleteThis comment has been removed by the author.
DeleteAshley- I'm glad you came across my blog too! I'm still just getting started but I'm having a blast with it. Thanks for your kind words. I would love to see how your bathroom wood plank project turns out!
Delete